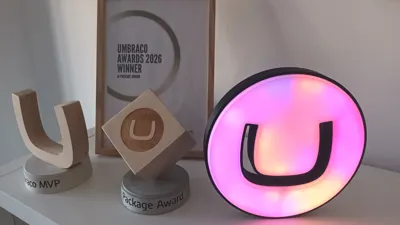
Back in November 2023, Matt Brailsford posted the UmbLamp to GitHub. It is a 3D printed, Umbraco infused smart light, powered by WLED and compatible with Home Assistant. I saw it, immediately wanted one, and then hit the obvious problem: I did not own a 3D printer.
That changed in July when I bought a Bambu Lab A2L. After a few weeks of printing fidget toys for my son and getting to know the machine, I decided it was time to finally build the UmbLamp.
Sourcing the components
Matt's repo lists everything you need, along with purchasing links for a few different countries. Some of the exact components he recommends are no longer easy to get hold of in the UK, so I put together my own list from Amazon:
AZDelivery D1 Mini V3 NodeMCU ESP8266, pack of 5 (currently out of stock)
SUNGUY 2m Micro USB cables, 3 pack at £9.99
The whole lot comes in cheap. The D1 Minis arrive in a pack of five, which is handy because it means you have spares for the next project. Worth noting that these boards use Micro USB rather than USB-C, so make sure the cable you buy matches.
Printing the parts
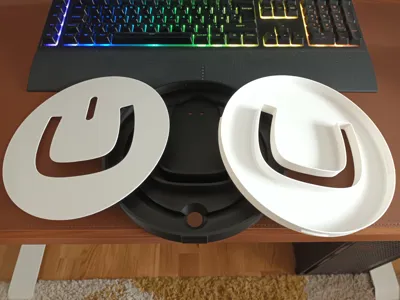
Honestly, this was the easy bit. The lamp is three snap-fit parts: a black base, a reflector and a lens. All three are designed to print without supports.
I printed the base in black and the reflector and lens in ivory rather than bright white. Ivory is an off-white, and I wondered whether it would look wrong - but it does not. Once the LEDs are lit you genuinely cannot tell.
The only thing I had to change was the lens, which I rotated 180 degrees so it printed in the correct orientation. Other than that, it was slice, print, done.
Wiring and soldering
This is where I came unstuck.
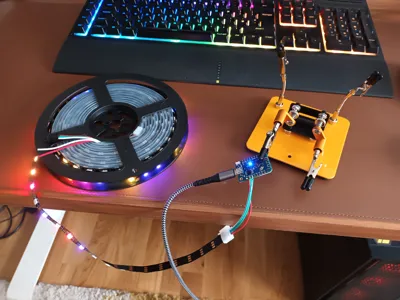
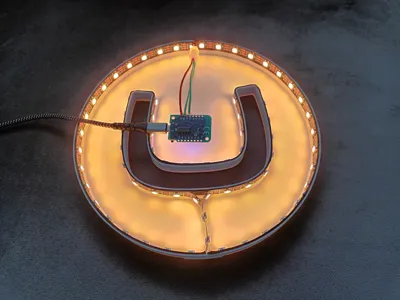
One thing that saved me a job: this strip comes with the wires already attached, so there was nothing to solder at the strip end. The only soldering needed was getting those three wires onto the D1 Mini.
The strip is also the IP67 version, which means it is encased in a silicone sleeve for waterproofing. Great if you are putting it outside, less great when you are trying to fit it into the reflector. I had to carefully cut the silicone away. Take your time here, it is easy to cut something you did not mean to.
My soldering skills are not the best. On my first attempt, one of the cables came away from the PCB, so I stripped it back and started again on the same board. The connectors are tiny and there is not much room for error. If you aren't great at soldering like me, take it slowly, and remember you have four spare boards in the pack if it all goes wrong.
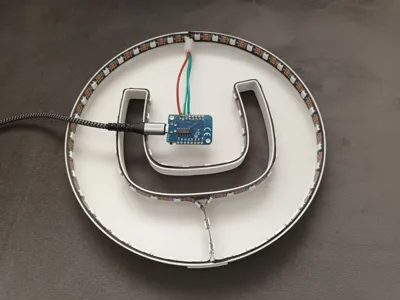
You only need three connections: +5V, G and data. The data line goes to D4 on the D1 Mini, just above the +5V and ground pins.
A word on USB cable length
This one is worth calling out because it nearly caught me out and it is easy to avoid.
Once the USB lead is fed through the back of the base and connected to the D1 Mini, you cannot disconnect it without taking the whole lamp apart. So work out where the lamp is going to live and where the nearest socket is before you buy the cable. I went for 2m leads for exactly this reason and I am glad I did.
Setting it up in WLED
Flashing WLED is the most straightforward part of the whole build. Plug the D1 Mini into your computer, go to the WLED web installer, flash the latest build and connect it to your WiFi. That is it.
Once assembled, go into Config, LED Preferences and set the strip length to the number of LEDs you actually installed. It is worth counting these as you stick the strip down, because guessing is a pain to correct later. Save that, and the rest of the lamp lights up. From there you can set up whatever effects you want and save your favourite as a preset, then set that preset as the default so it comes on the way you want it every time.
The result
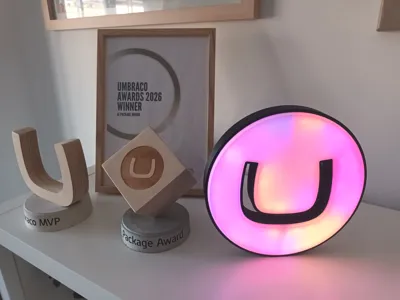
I am really pleased with how it turned out. The printed parts came out clean, the diffusion through the ivory lens is lovely, and the Umbraco logo glowing looks great.
It now sits on the display unit behind my desk, alongside my Umbraco MVP and AI Package Award trophies, which feels like exactly the right home for it.
Would I recommend it?
Yes. It is a fun weekend project, the parts are cheap, and the instructions Matt has put together are clear. The 3D printing is easy. The soldering is the part that will test you, so go slowly, and buy more LED strip than you need so you have room to make mistakes.
If you fancy building your own, everything you need is in Matt's repo. And a hat tip to Martin Woodward, whose Octolamp the UmbLamp is based on.

Written by Justin Neville
Justin has worked in software development since 1998. He began writing C and C++ applications, moving to C# and .NET development in 2002. From 2002 to 2013 he built large-scale internal web applications for major companies in the finance and insurance sectors. In 2013, he founded Nevitech IT Solutions Ltd, and since then has focused exclusively on building and supporting websites using Umbraco CMS.
Justin is an Umbraco Certified Master and an Umbraco MVP for 2026. He won the Umbraco AI Package Award for his AI Log Analyser package, contributes to the Umbraco CMS core, and co-organises the Umbraco Kent Meetup. His particular strengths include system architecture, performance optimisation, complex troubleshooting, and writing clean, scalable code. He also mentors junior developers and works closely with agency partners on complex builds requiring specialist expertise.